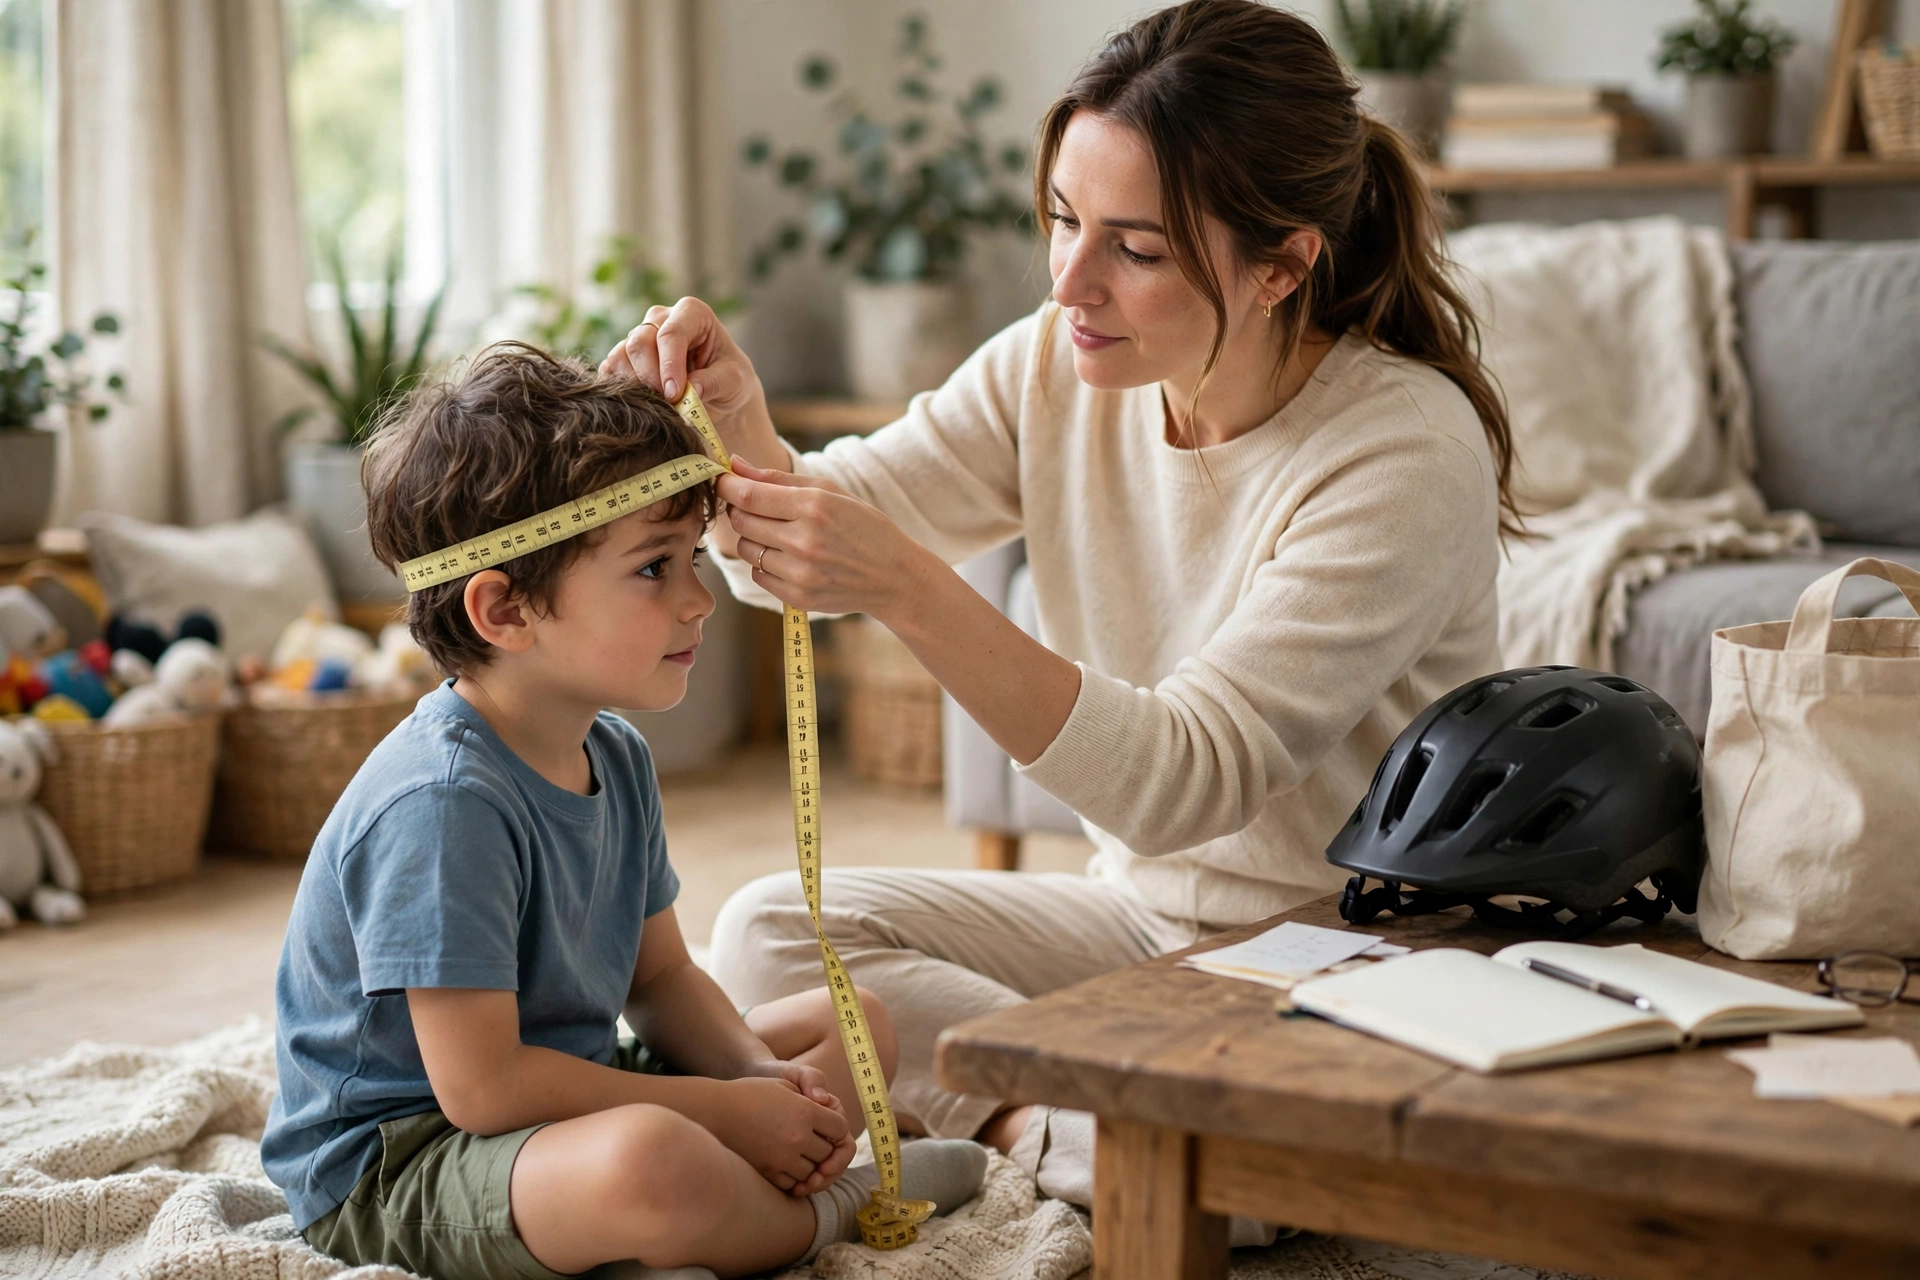
To measure a child’s head for a helmet, wrap a soft measuring tape around the widest part of the head — about an inch above the eyebrows and ears — keep it level and snug, and read the measurement in centimeters. That number, matched against the size chart of the helmet you are buying, is what decides the size, not your child’s age.
It sounds simple, and it is, but small mistakes — a tilted tape, measuring over a bulky hairstyle, rounding down — are the most common reason a new helmet turns out too loose or too tight. This guide walks through the tools, the exact tape position, and how to get a trustworthy reading even on a child who will not sit still.
What Do You Need to Measure a Child’s Head?
The best tool is a soft tailor’s measuring tape, the flexible kind used for sewing. It bends around the head, lies flat, and reads directly in centimeters. Most helmet size charts, including those from US brands, are built around centimeters, so measuring in centimeters avoids conversion errors.
No soft tape at home? Use a piece of string, a ribbon, or even a phone charging cable. Wrap it around the head in the same position, pinch or mark where the end meets, then lay it flat against a ruler or a metal tape measure and read the length. A rigid metal tape measure on its own does not work — it cannot follow the curve of a child’s head and will give a meaningless number.
One more habit is worth building: write the measurement down with the date. Children’s heads grow in spurts, and a dated record turns next season’s shopping from a guess into a comparison — you can see at a glance how much your child has grown and whether the current helmet is likely to be near the end of its size range. Many parents keep the number in a phone note alongside shoe sizes, which makes reordering or shopping for a second helmet for grandparents’ house much simpler.
Where Exactly Does the Tape Go?
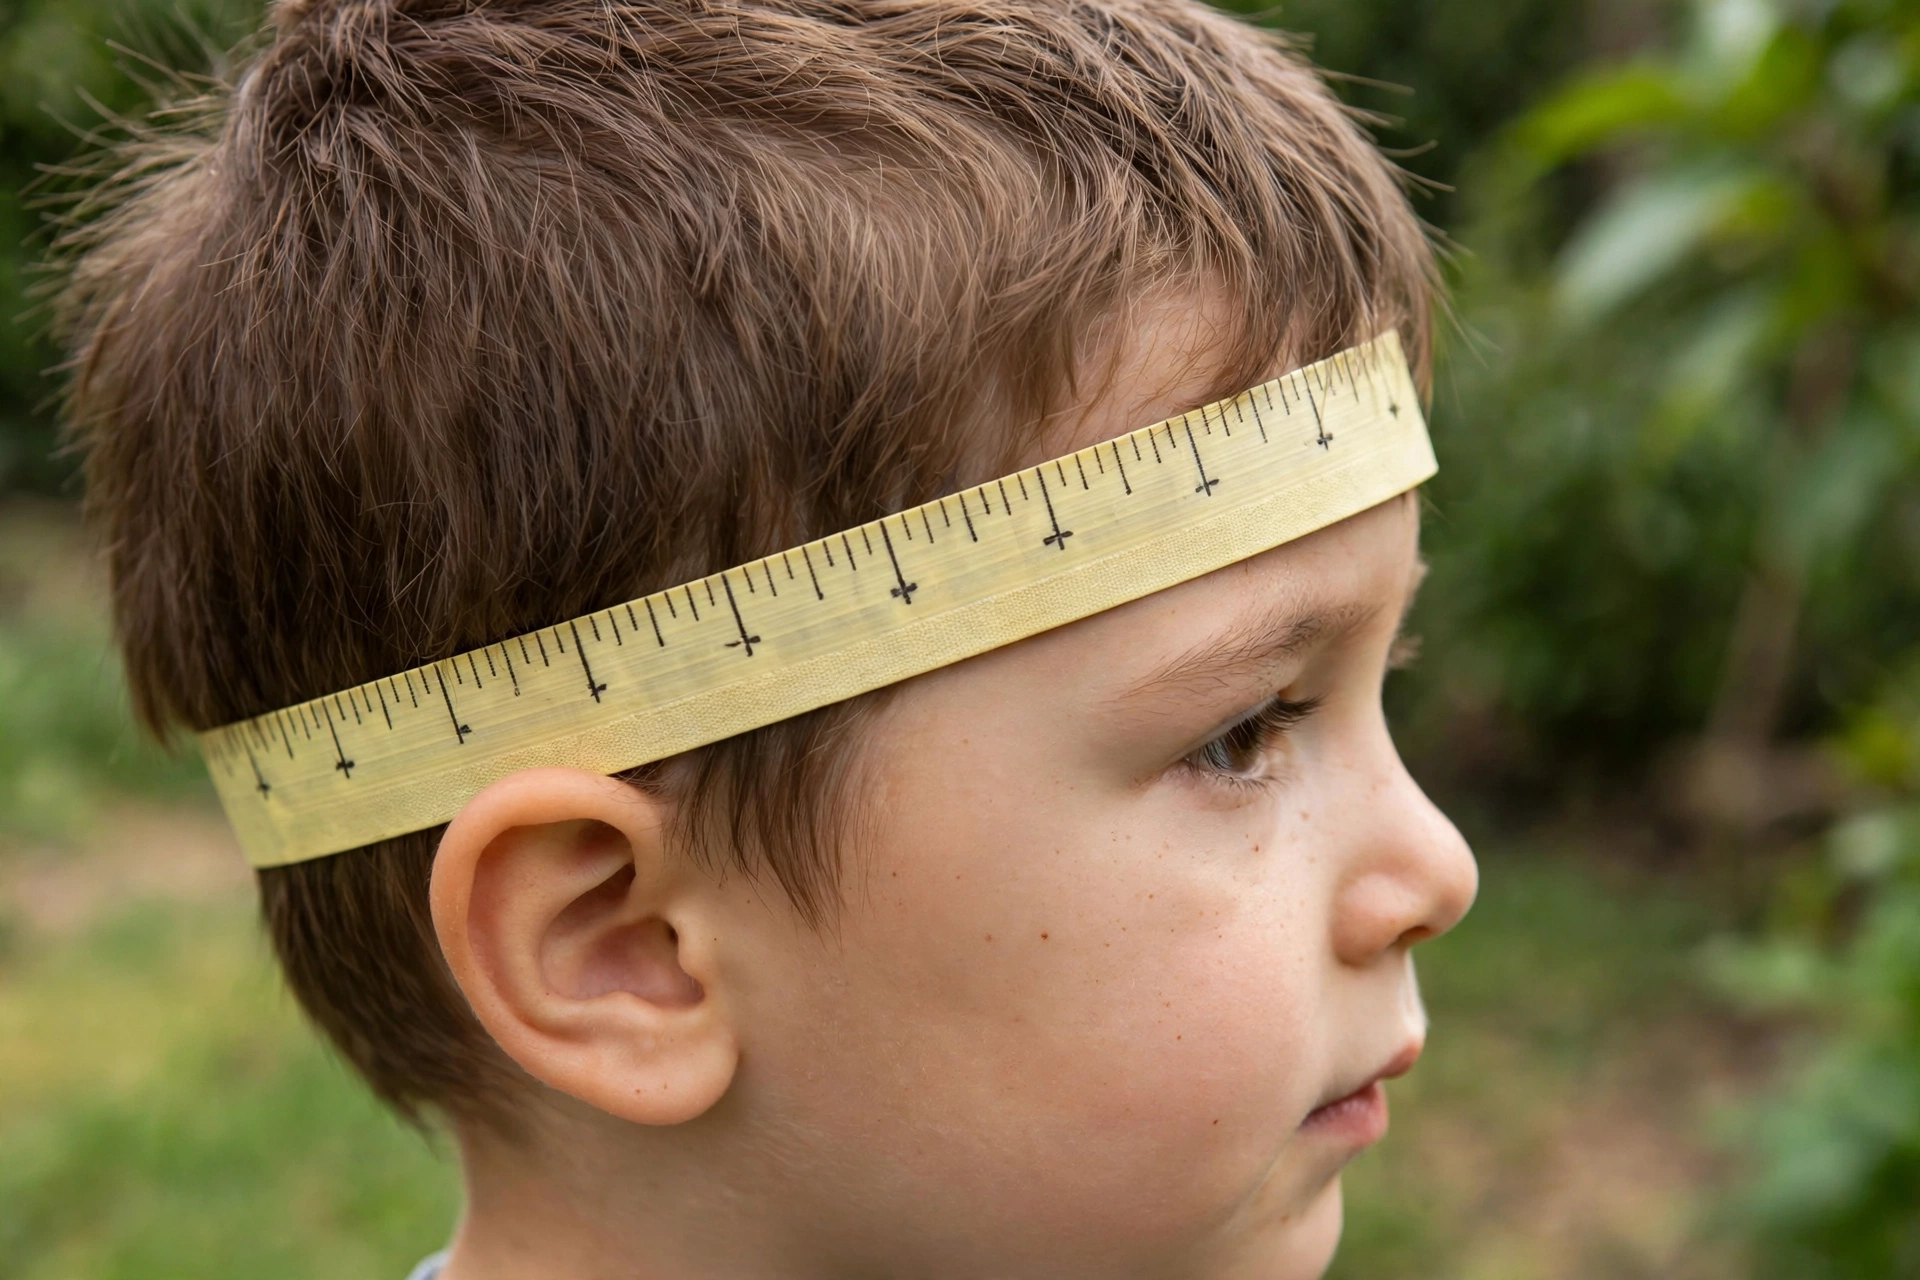
Position is everything. The tape should circle the head at its largest circumference: across the forehead roughly one inch (about two finger-widths) above the eyebrows, just above the tops of the ears, and around the bump at the back of the head. Keep the tape level all the way around — if it rides up at the back or dips at the front, the reading will be wrong.
The tape should lie flat against the head, snug enough that it does not slide around, but not pulled so tight that it dents the skin or compresses the hair into an artificial smaller size. Have your child look straight ahead, head level, rather than tilted up or down. Measure with the hairstyle your child will actually wear under the helmet; a thick ponytail or bulky braids worn under the helmet add real size and should be measured in place, worn low the way they will sit when riding.
How Do You Get an Accurate Reading on a Wiggly Child?
Young children rarely cooperate with a tape measure on the first try, so build in a little strategy. Measure when your child is calm and fed, not tired or hungry. Turn it into a game — measure a favorite stuffed animal or doll first, then “check” whether your child’s head is bigger. Standing the child in front of a mirror often holds their attention for the few seconds you need.
Take the measurement two or three times and use the largest consistent reading. If your three tries give wildly different numbers, the tape is probably slipping or tilting — slow down, re-level it, and try again rather than averaging guesses. An older child can hold the tape’s end at the forehead while you bring the tape around, which makes them a helper instead of a subject.
How Do You Turn the Measurement Into a Helmet Size?
Take your centimeter number to the size chart of the specific helmet you are buying. This step matters more than parents expect: there is no universal standard for what “small” or “ages 5–8” means, and the same measurement can be a medium in one brand and a large in another. Match the number to that brand’s chart, in that order — measurement first, label second.
Once the size is right, it is worth understanding what else a good helmet offers. Protection features have improved a lot in recent years, and our guide to MIPS and how rotational helmet liners work explains one option many parents choose for kids. Features never rescue a wrong size, though — a correctly measured, correctly fitted basic helmet beats an expensive one in the wrong size every time.
What If Your Child Is Between Sizes?
Between-sizes measurements are common, especially mid-growth-spurt. As a rule, start with the smaller size if your child is just barely into it, because helmet pads compress slightly with wear and a fit dial can fine-tune the fit — but only choose the smaller size if it sits comfortably with no pinching or forehead pressure marks after a few minutes.
Choose the larger size only if the smaller one is genuinely too tight, and then use the helmet’s rear fit dial and any thicker pads supplied by the manufacturer to snug it up. Never pad out a too-big helmet with a hat, extra foam, or cloth underneath — improvised padding changes how the helmet sits and can seriously reduce its protection. If neither size works in one model, switch brands: head shapes differ, and another brand’s chart often fits a between-sizes head perfectly.
Frequently Asked Questions
Q: Should I measure in inches or centimeters?
A: Centimeters. Most helmet charts are published in centimeters even in the US, and centimeter readings are more precise. If your tape only shows inches, measure carefully and convert (1 inch = 2.54 cm), then double-check the result.
Q: How often should I re-measure my child’s head?
A: Re-measure at the start of each riding season and whenever a helmet starts to feel tight or leaves deep red marks. Children’s heads grow steadily, and last year’s size is a guess, not a measurement.
Q: Can I buy a bigger helmet for my child to grow into?
A: No. A helmet that is too big shifts and can come off or protect the wrong area in a fall. Buy the size that fits the measurement you took today, and replace it when your child outgrows it.

Olivia
Writer at Helmet Today, covering helmet reviews, fit and riding safety.