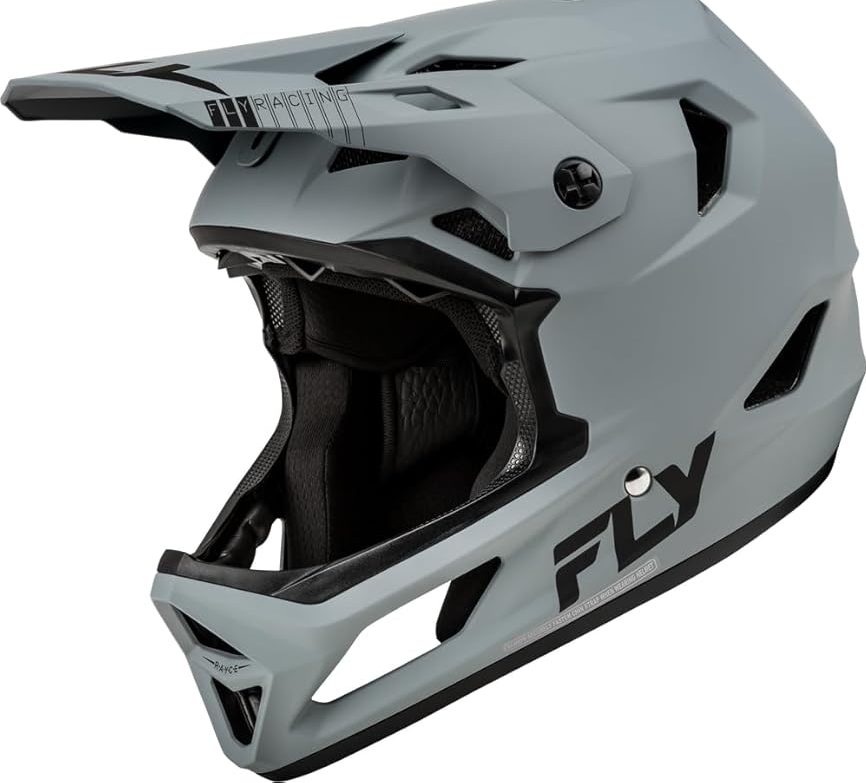

Removing a helmet cushion sounds easy until you pull the wrong part and hear a tiny snap. That is the moment most people stop and wonder if they just broke something.
If you are searching for how to remove Vega helmet cushion, the safe method is to work slowly and check how the liner is attached. Vega helmets can use different liner designs, so the exact steps may vary by model. I would rather spend five extra minutes checking the attachment points than force a stubborn pad.
How to Remove Vega Helmet Cushion Without Damage
The main goal is simple: release the cheek pads and inner liner without damaging the clips, fabric, foam, or helmet shell.
Before starting, place the helmet on a clean table. This makes the small clips easier to see and stops the helmet from rolling around.
| What to check | Why it matters |
|---|---|
| Removable liner | Some Vega liners are designed to come out |
| Plastic snaps | These can release with gentle pulling |
| Hook-and-loop areas | Pull the fabric apart slowly |
| Fixed foam | Do not try to remove glued foam |
Check Your Vega Helmet First
Look inside the helmet before touching anything. Check the cheek pads, crown liner, and edge of the inner padding.
A removable cushion often has visible snaps or small attachment points. If the foam looks permanently glued to the shell, do not pry it out.
This is one detail that can save a lot of trouble. A helmet liner is not the same as a loose seat cushion. Some parts are meant to come out, while others are part of the helmet’s construction.
Start With the Cheek Pads
If your model has removable cheek pads, they are often the easiest part to release.
Hold the fabric near the attachment point. Pull gently and evenly rather than grabbing the foam itself.
| Action | Better method |
|---|---|
| Pulling a pad | Hold the fabric or base |
| Releasing a snap | Pull near the snap |
| Removing hook-and-loop | Separate slowly |
| Stuck pad | Check for another attachment point |
Do not yank the cheek pad from one corner. That can put stress on the stitching and attachment hardware.
What Tools Do You Need?
In most cases, how to remove Vega helmet cushion is not a tool-heavy job.
Your hands may be enough. A small flashlight can help when the attachment points are hard to see.
| Tool | Use |
|---|---|
| Clean hands | Main removal method |
| Small flashlight | Find hidden clips |
| Soft cloth | Protect the helmet surface |
| Mild soap | Clean removable padding |
I would avoid screwdrivers, knives, pliers, and other sharp tools unless the specific helmet manual clearly calls for them.
A screwdriver may seem useful when a pad is stuck. It can also tear the liner or scratch the helmet.
How to Remove the Main Vega Helmet Liner
Once the cheek pads are out, look at the crown liner. This is the padded section that sits against the top and sides of your head.
Do not pull the whole liner at once. Start at one attachment point and work around it.
Release Each Attachment Point Slowly
Find the first snap or fastening point. Support the liner close to that point and gently release it.
Then move to the next attachment.
This small habit matters. If you pull from the middle of the liner, the force can spread across several attachment points. That makes it harder to see what is holding the liner in place.
| If you see… | Do this |
|---|---|
| Snap fastener | Pull close to the snap |
| Hook-and-loop | Separate the surfaces slowly |
| Elastic section | Stretch only as needed |
| Glued section | Leave it in place |
If one section refuses to move, stop and look again. There may be another clip hiding underneath the fabric.
Do Not Pull the Foam Apart
The soft foam inside a helmet can look like a removable cushion. That does not always mean it is designed to come out.
This is an easy mistake to make.
The removable comfort liner is different from protective foam inside the helmet. Do not remove or cut protective foam just because you want to clean the inside.
What If the Vega Cushion Feels Stuck?
A stuck liner does not always mean it is damaged. Dirt, sweat, tight clips, or an awkward angle can make removal harder.
Try changing your grip before using more force.
| Problem | Safer response |
|---|---|
| Pad will not move | Find all attachment points |
| Clip feels tight | Pull straight and gently |
| Fabric starts stretching | Stop pulling the fabric |
| Foam begins tearing | Stop immediately |
One useful rule is simple: if the part starts stretching instead of releasing, stop.
That usually means you are pulling the wrong area or the attachment has not been released.
Common Mistakes When Removing Helmet Cushions
Most liner problems come from using too much force too soon.
A helmet can feel strong, but the comfort liner, stitching, snaps, and fabric still need care.
Mistake: Pulling From the Foam
Foam is soft and easy to grip. It is also easy to damage.
Try to hold the liner close to its attachment point instead. This puts less stress on the foam.
Mistake: Using a Sharp Tool
A knife or screwdriver can quickly turn a simple cleaning job into a repair job.
It may also damage the fabric or scratch the inside of the helmet.
Mistake: Forgetting the Original Position
When you remove several pieces, it is surprisingly easy to forget where they go.
Take a quick photo before removal. It gives you a simple reference when putting everything back.
| Mistake | Better approach |
|---|---|
| Pulling the foam | Hold the liner near the base |
| Forcing a clip | Check its release direction |
| Mixing up pads | Photograph the layout |
| Removing glued foam | Leave it alone |
Can You Wash a Vega Helmet Cushion?
If the cushion is removable and the care instructions allow washing, cleaning it can help with sweat and odor.
Do not assume every liner can go into a washing machine. Check the instructions for your specific Vega helmet first.
For many removable fabric liners, gentle hand washing is a safer choice than harsh cleaning.
Dry the Cushion Completely
After washing, let the padding dry fully before putting it back into the helmet.
Avoid high heat unless the manufacturer specifically allows it. Heat can affect foam, fabric, adhesives, and other materials.
| Cleaning method | General advice |
|---|---|
| Mild soap and water | Usually the gentler option |
| Strong detergent | Avoid unless approved |
| High heat | Avoid |
| Damp storage | Never |
A helmet that smells fine on the outside can still hold moisture inside the padding. Proper drying matters just as much as washing.
How to Put the Vega Cushion Back
Putting the liner back is basically the reverse of removal, but alignment matters.
Start with the crown liner and match each attachment point with its original position. Then reinstall the cheek pads.
Do not simply press everything into place and assume it is correct.
Check the Fit Before Riding
After reinstalling the cushion, put the helmet on and check how it feels.
The liner should sit evenly. The cheek pads should not feel twisted or pushed into an odd position.
| Check | What you want |
|---|---|
| Crown liner | Sits flat |
| Cheek pads | Even on both sides |
| Straps | Not trapped by liner |
| Fit | Secure and comfortable |
If the helmet suddenly feels loose or strangely shaped, remove it and check the liner again.
A poorly fitted liner can change how the helmet sits on your head.
When You Should Not Remove the Cushion
There are times when removing the cushion is not the right move.
If the liner is permanently attached, badly damaged, or connected to parts you cannot identify, stop instead of experimenting.
The same applies if the helmet has been involved in a serious crash. Cleaning the padding does not restore damaged protective material.
Know the Difference Between Liner and Safety Foam
This is probably the most important lesson in the whole process.
The comfort liner is there for fit and comfort. The protective foam beneath it plays a much more important role during impact.
Do not cut, reshape, drill, or remove protective foam to make more room.
| Part | Remove it? |
|---|---|
| Removable cheek pad | Yes, if designed for removal |
| Removable comfort liner | Yes, if the model allows it |
| Glued comfort foam | Usually no |
| Protective impact foam | No |
Final Thoughts
Learning how to remove Vega helmet cushion is mostly about patience. Find the attachment points, release them one at a time, and avoid pulling on foam or using sharp tools.
The biggest mistake is assuming that every soft part inside a helmet is removable. It is not. If a part does not release with gentle pressure, stop and check the model’s instructions.
A clean liner can make a helmet much nicer to wear, especially after regular use. Just keep the cleaning job separate from the helmet’s protective structure. When in doubt, leave the fixed parts alone and get model-specific guidance.
FAQs
Can I remove the cushion from a Vega helmet?
Yes, if your Vega model has a removable liner or cheek pads. Check the fasteners first and never force glued or fixed padding.
How do I remove Vega helmet cushion without damage?
Release each snap or hook-and-loop section slowly. Hold the liner near its base and avoid pulling directly on the foam.
Can I wash a removable Vega helmet liner?
Usually, removable fabric padding can be cleaned gently, but check your model’s care guide first. Let every part dry fully before reuse.
Why is my Vega helmet cushion not coming out?
It may have another hidden clip or fixed section. Stop pulling, inspect the edges, and check the helmet instructions before using more force.
Can I remove the foam inside a Vega helmet?
No. Do not remove or reshape protective impact foam. Only remove parts that the helmet design clearly identifies as removable.

Olivia
Writer at Helmet Today, covering helmet reviews, fit and riding safety.