
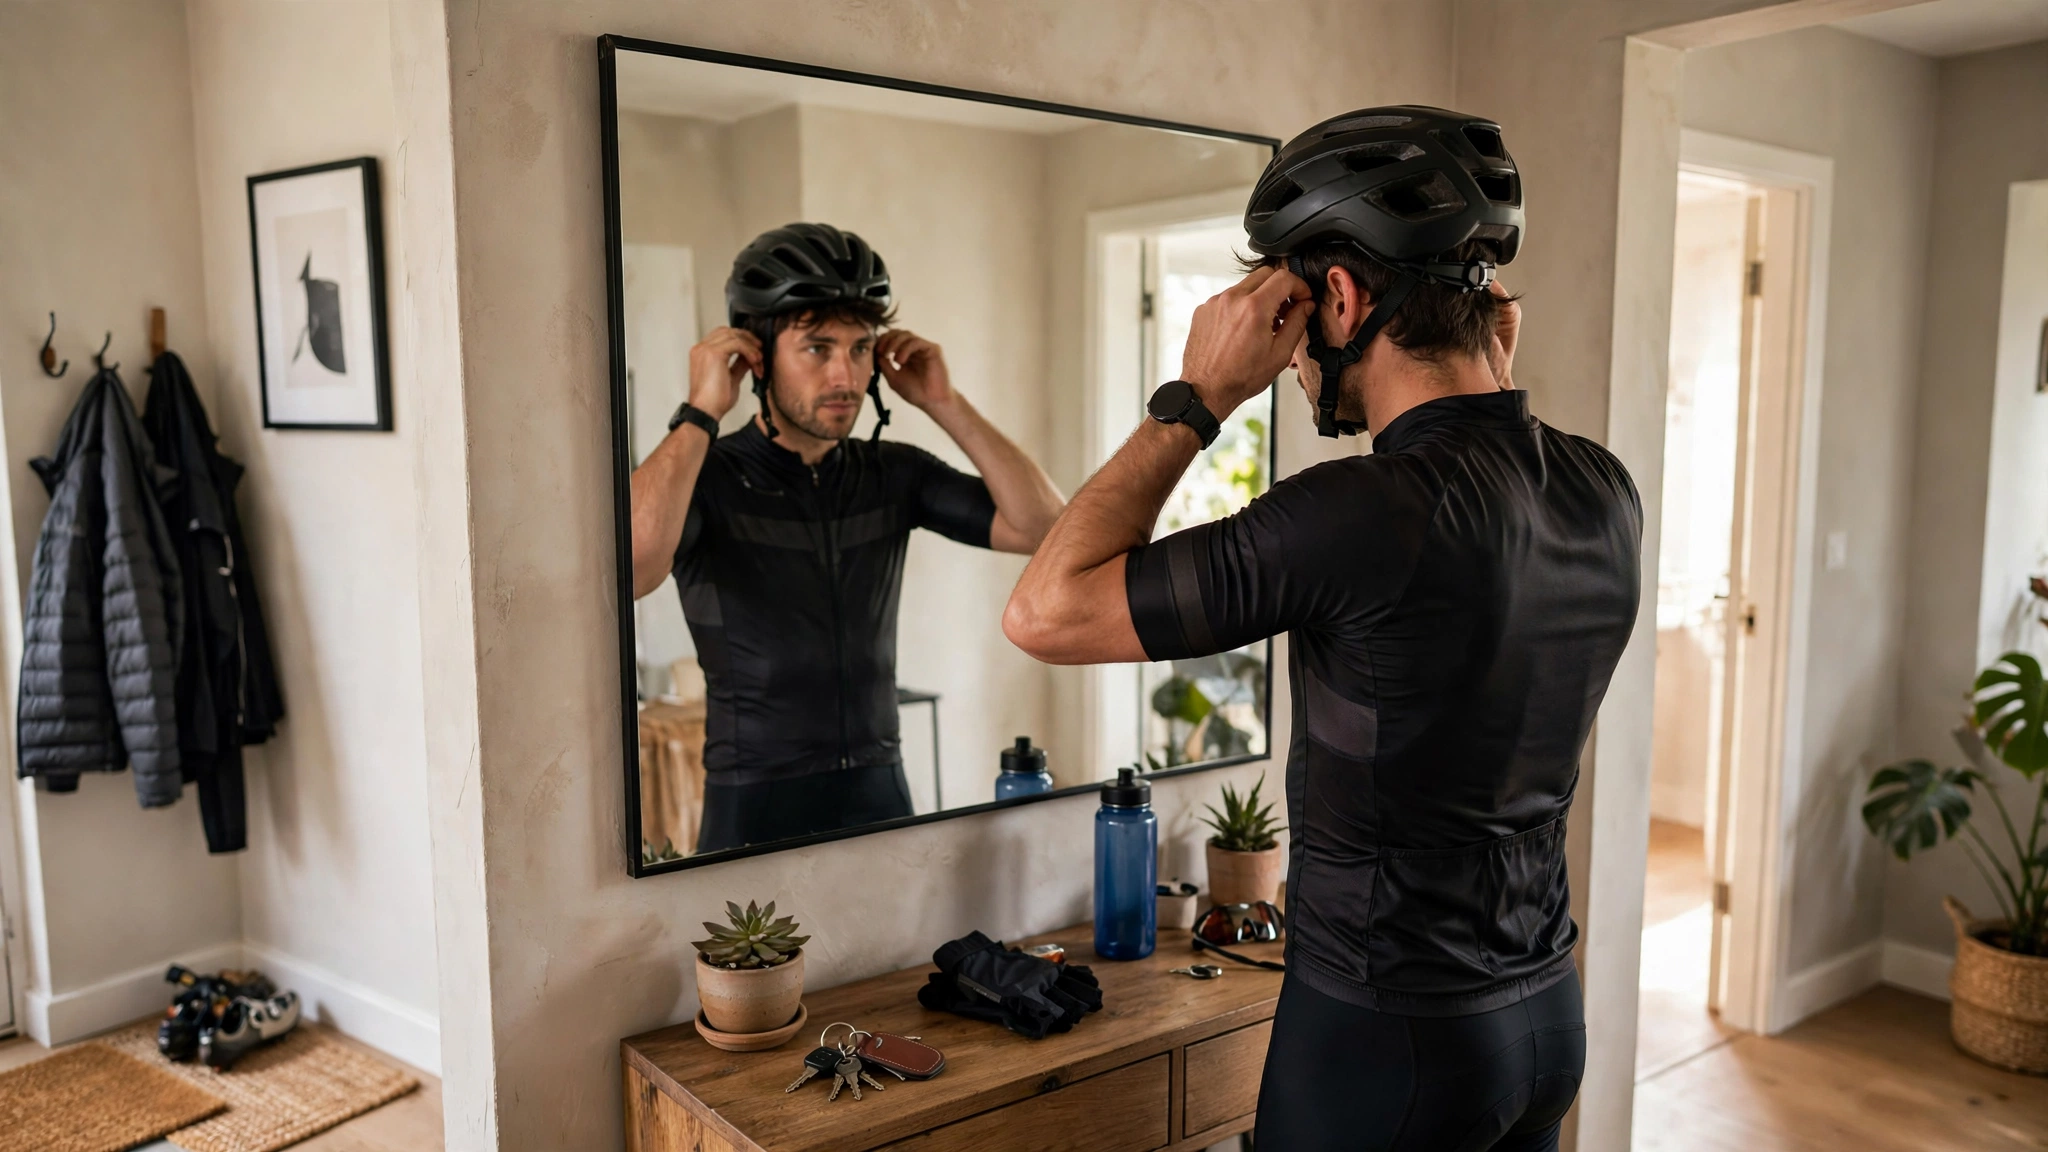
To adjust bike helmet straps for a level fit, follow this order: seat the helmet level on your head first, set the rear dial or pads so it stays put without rocking, adjust the side sliders so the straps form a V just below each ear, then set the chin strap snug — about one to two fingers of slack — and finish with a shake test. Straps adjusted in the wrong order, or a helmet fitted while it sits tilted, will never sit level no matter how tight you pull them.
This guide gives the full sequence, the checks that prove the fit is right, and the fixes for the problems riders meet most often.
Why Does the Order of Strap Adjustment Matter?
Because each adjustment depends on the one before it. The helmet’s position on your head decides where the straps naturally fall, so sliders set while the helmet sat too far back will sit in the wrong place once you level it. The rear fit system decides how stable the helmet is, which changes how much work the chin strap has to do. Riders who start by yanking the chin strap tight are usually compensating for one of the earlier steps being wrong.
Strap systems are also designed around a specific geometry: the side straps divide around your ear, meeting at a slider below the earlobe, so the helmet is held evenly front and back. If that geometry is off, one strap does all the work and the helmet tips toward the loose side.
Do the whole job at home, in a mirror, with time to spare — not in a car park two minutes before a group ride. Once set correctly, straps rarely need more than an occasional check.
How Do You Set the Helmet Level Before Touching the Straps?
Put the helmet on and position it first: level means the front edge sits low on your forehead — roughly a couple of finger-widths above your eyebrows — and the helmet is not rotated to either side. Look in a mirror face-on and from the side. The classic fault is the helmet perched toward the back of the head with the forehead bare; it leaves the front of the head unprotected in the most common kind of fall.
Next, set the internal fit. Most helmets use a rear dial cradle, interchangeable pads, or both. Adjust until the helmet feels evenly snug all around and — with the chin strap still open — stays in place when you shake your head gently and bend forward. If it slides forward or lifts at the back at this stage, the size or shape is wrong for you, and no strap adjustment will fully rescue it.
Check for interference before going further: thick hair piled under the helmet, a bulky cap, or sunglasses arms trapped under straps all shift the geometry. Wear your hair as you ride, then move on to the sliders.
How Do You Adjust the Side Straps and Ear Sliders?
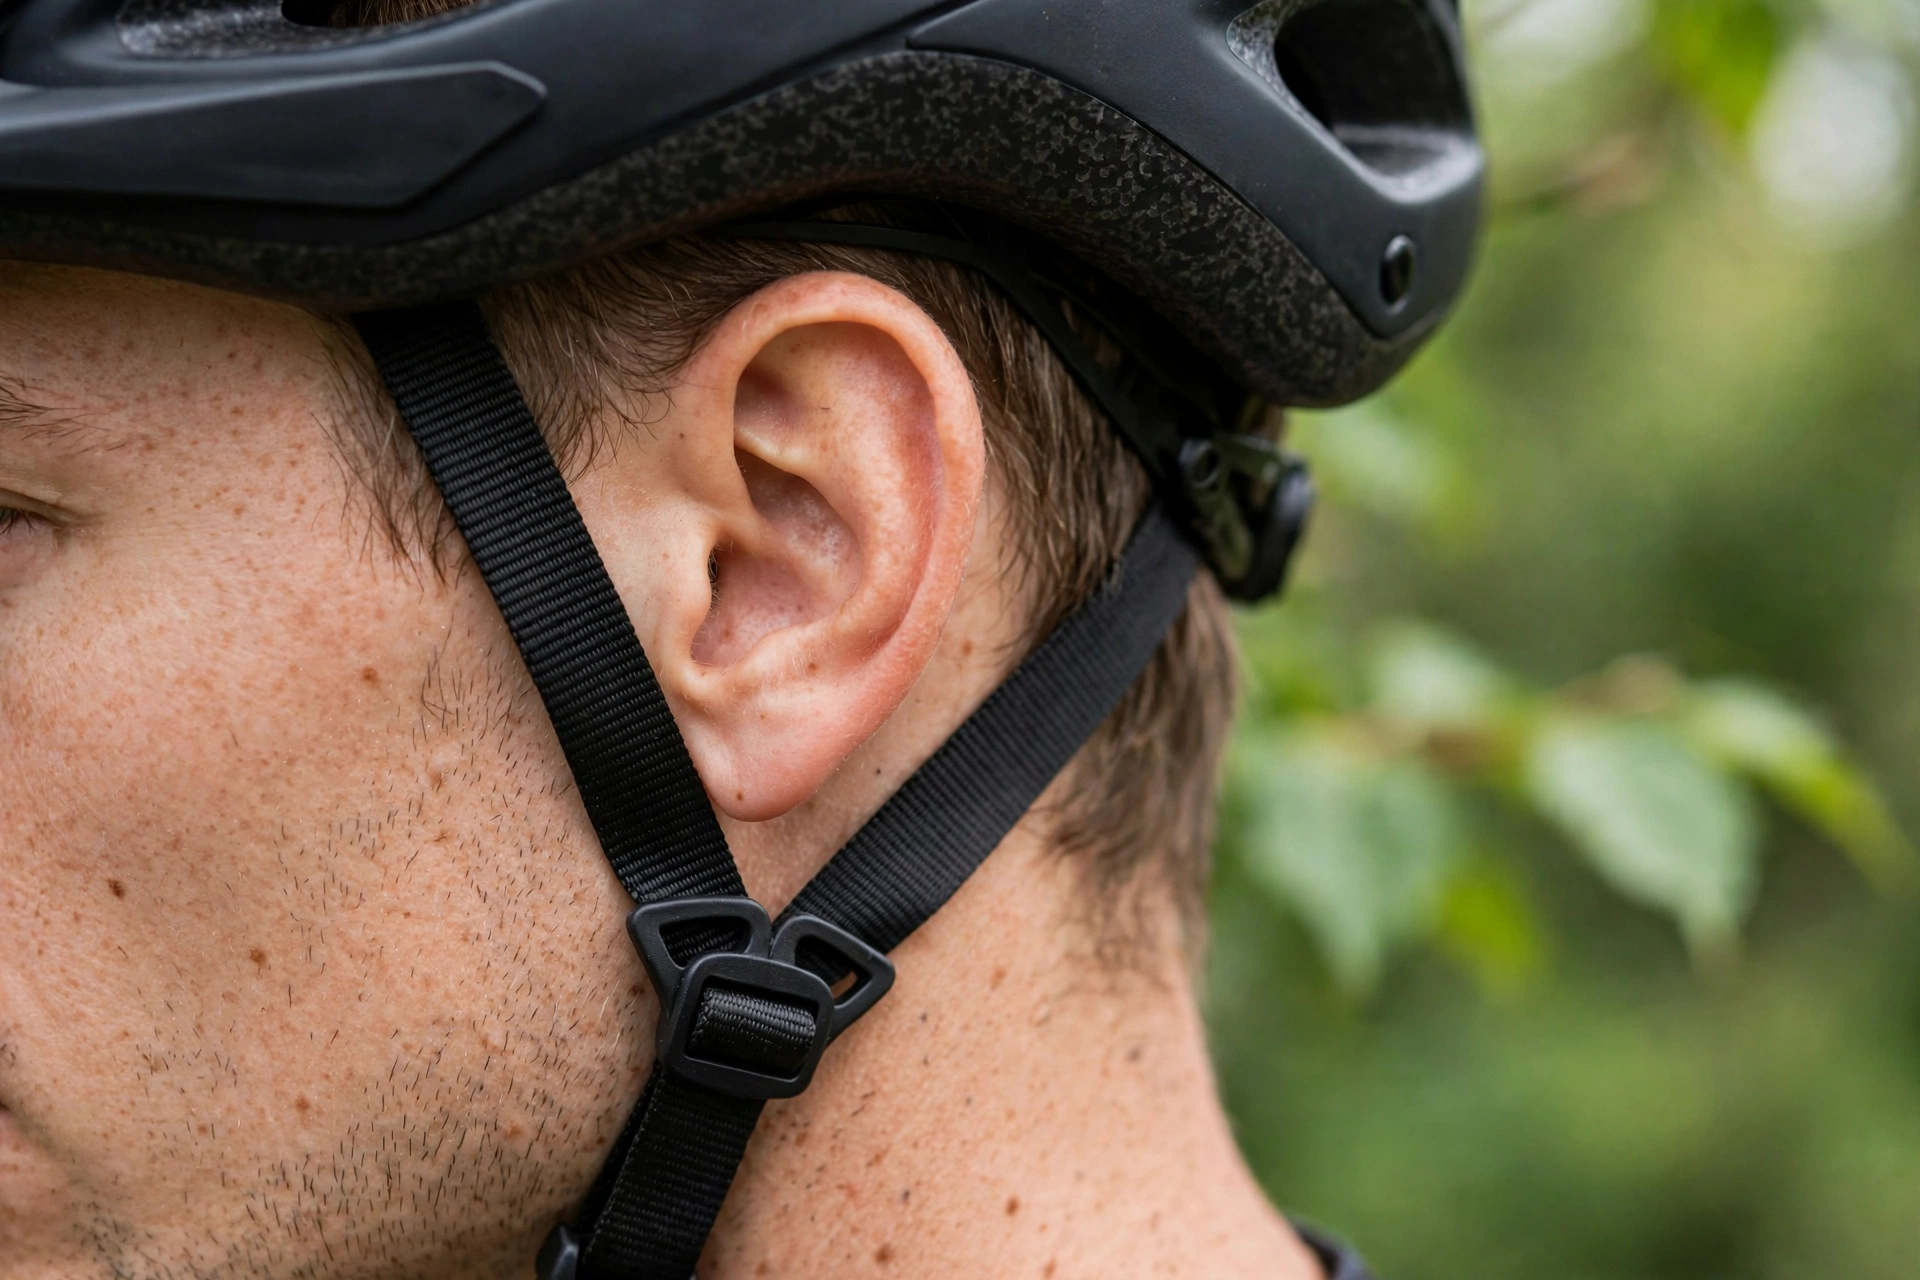
Each side has straps that run from the front and rear of the helmet and join at a slider below your ear. Slide that divider until it sits just below your earlobe, with the front strap passing in front of the ear and the rear strap behind it — forming a neat V with your ear inside it. If the slider sits on the ear itself, or the two straps cross over it, the fit will irritate all ride and the helmet can rotate.
Balance the strap lengths as you go: the goal is even tension, so neither the front nor the rear strap feels tight while the other hangs loose. Do one side, mirror the other, and then compare them in the mirror — sliders are very commonly set at different heights, and your head can feel the asymmetry before your eyes spot it.
Some helmets add locking sliders or fixed-position dividers that cannot drift; others creep over time. If your sliders wander every few rides, note their correct positions — a small mark or a photo on your phone — so the reset takes seconds.
How Tight Should the Chin Strap Be, and How Do You Set It?
Fasten the chin strap and pull it snug under your chin — not against your throat. The common guide is one to two fingers fitting between the strap and your chin: snug enough that the helmet cannot be rolled forward off your head or lifted from the back, loose enough to talk, breathe, and open your mouth without strain. If the strap is set right, pushing up firmly under the chin bar area of the helmet should move your whole head, not just the helmet.
Set the strap length through the buckle so the buckle sits roughly centred under your chin, not jammed against one side of your jaw. Off-centre buckles twist the strap system, pull the helmet sideways, and chafe. Tidy the loose end if your helmet provides a keeper or elastic loop.
Now run the full test sequence: shake your head side to side and up and down, and lean forward as if riding. The helmet should stay level and settled, and the straps should stay in their V below the ears. If it fails any part, go back one step in the order — position, fit system, sliders, chin strap — rather than simply tightening everything.
- Level: front edge a couple of finger-widths above the eyebrows, not tilted back
- Sliders: V below each earlobe, even tension front and back, both sides matching
- Chin strap: snug under the chin, one to two fingers of slack, buckle centred
- Test: shake, nod, and lean — the helmet moves with your head, never on it
What Strap Problems Should You Recheck Over Time?
Straps are not set-and-forget forever. Webbing stretches slightly, sliders creep, and the rear dial gets knocked. Build a ten-second check into your routine — helmet on, glance at the sliders, tug the chin strap — every few rides, and a full refit whenever anything feels different.
Know the faults that mean repair or replacement rather than adjustment. Frayed or cut webbing, a buckle that no longer clicks positively, cracked sliders, or straps pulling at their anchor points are end-of-life signs for a helmet, because the retention system is part of its certified design and is not a home repair. Likewise, any helmet that has taken a crash impact should be replaced: its foam has done its one job, including in the angled impacts discussed in this guide to what MIPS is for helmets.
Keep the system clean so adjustments stay honest. Sweat and sunscreen stiffen webbing and make sliders gritty; a gentle wash in mild soapy water, rinsed and air-dried away from heat, keeps straps sliding and buckles clicking as designed.
Frequently Asked Questions
Q: Why does my helmet keep tipping back even with tight straps?
A: Usually because it was positioned too far back before the straps were set, or the rear straps are looser than the front. Re-level the helmet first, set the rear fit system, then rebalance the sliders.
Q: Should the helmet straps go over or under my ears?
A: Neither strap should cross your ear. The front strap runs in front of the ear and the rear strap behind it, meeting at the slider just below the earlobe, so your ear sits inside the V the straps form. A slider resting on the ear itself is set too high.
Q: How often should I readjust my helmet straps?
A: Give them a quick check every few rides and a full refit whenever the helmet feels different — after washing pads, a haircut that changes volume, or any knock to the adjustment system.

Olivia
Writer at Helmet Today, covering helmet reviews, fit and riding safety.